
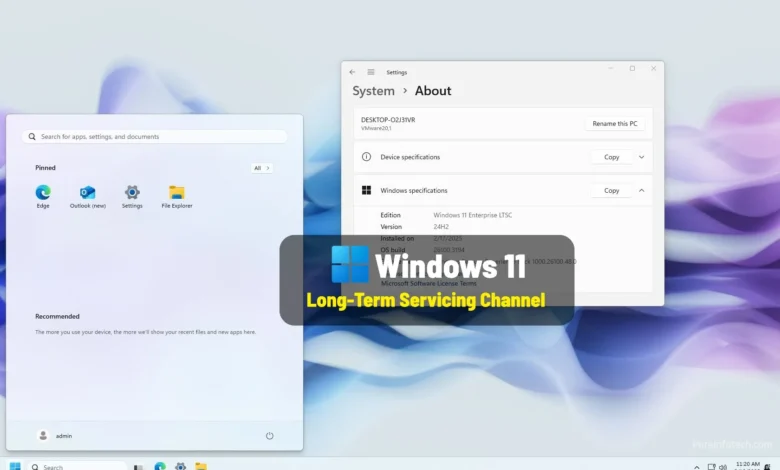
If you’re looking for a stable, streamlined version of Windows 11, you might want to consider the LTSC (Long-Term Servicing Channel) edition. Designed with businesses and certain power users in mind, Windows 11 LTSC provides a more stable environment by minimizing feature updates and focusing on essential security patches. In this guide, we’ll walk you through everything you need to know to install Windows 11 LTSC in 2025. Whether you’re an IT professional or just someone looking for a more reliable Windows experience, this guide has got you covered!
What is Windows 11 LTSC?
Before we dive into the installation process, let’s clarify what Windows 11 LTSC is and why it might be the right choice for you. LTSC is a specialized version of Windows 11 that’s built for stability and security. Unlike the regular Windows 11 versions, LTSC doesn’t receive regular feature updates, which means you’ll avoid the constant changes that come with standard Windows updates. This makes it ideal for environments where reliability is critical, such as hospitals, factories, or certain enterprise-level use cases.
In 2025, you’ll still see the advantages of a clean, stable system that stays secure and doesn’t add unnecessary features. Plus, LTSC editions get extended support for several years, making it a great option for long-term use.
Why Choose Windows 11 LTSC?
There are a few key reasons why you might want to choose Windows 11 LTSC over the regular version:
- Stability: Since there are no major feature updates, your system remains stable without unexpected changes or compatibility issues.
- Security: LTSC gets critical security patches and bug fixes without the added overhead of new features.
- Fewer Resources Needed: Without the constant stream of feature updates, your system can run more efficiently, making it ideal for older hardware or systems with limited resources.
System Requirements for Windows 11 LTSC
Before you get started, make sure your system meets the minimum requirements for Windows 11 LTSC:
- Processor: 1 GHz or faster, with at least two cores on a compatible 64-bit processor or System on a Chip (SoC).
- RAM: 4 GB or more.
- Storage: 64 GB or larger storage device.
- Graphics: DirectX 12 compatible graphics / WDDM 2.x.
- System Firmware: UEFI, Secure Boot capable.
- TPM: Version 2.0.
- Internet Connection: Internet connectivity is necessary to perform updates and download certain features.
Make sure your hardware meets these requirements before proceeding. If you’re upgrading from a previous version of Windows, it’s also a good idea to back up your data first!
How to Install Windows 11 LTSC in 2025
Ready to install Windows 11 LTSC? Here’s a simple, step-by-step guide to help you get started:
Step 1. Download the Windows 11 LTSC ISO
First, head over to Microsoft’s official website or a trusted source to download the Windows 11 LTSC ISO. Make sure you download the correct version for your system architecture (64-bit).
Tip: As of 2025, you’ll likely need to be a part of the Microsoft Volume Licensing Service Center (VLSC) to get access to the LTSC ISO. If you don’t have access yet, check with your organization or request it from Microsoft.
Tip 2: You can also use the Windows 11 LTSC evolution 90 days for free.
Step 2. Create a Bootable USB Drive
You’ll need a USB drive with at least 8 GB of space. Use a tool like the Windows Media Creation Tool or Rufus to create a bootable USB drive with the Windows 11 LTSC ISO you just downloaded.
Once the tool is running, follow the on-screen instructions to create the bootable USB.
Step 3. Prepare Your PC
- Insert the bootable USB drive into the system where you want to install Windows 11 LTSC.
- Restart your computer and press the key to enter the boot menu (this could be F2, F12, ESC, or another key depending on your system).
- Select your USB drive as the boot device.
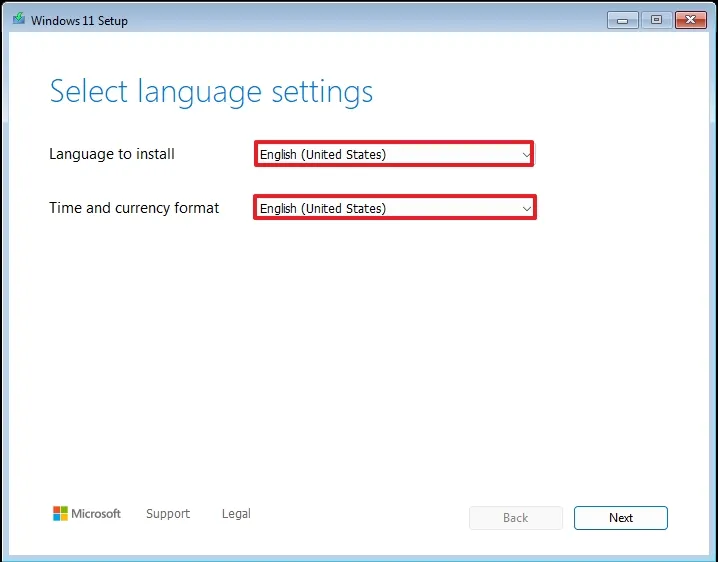
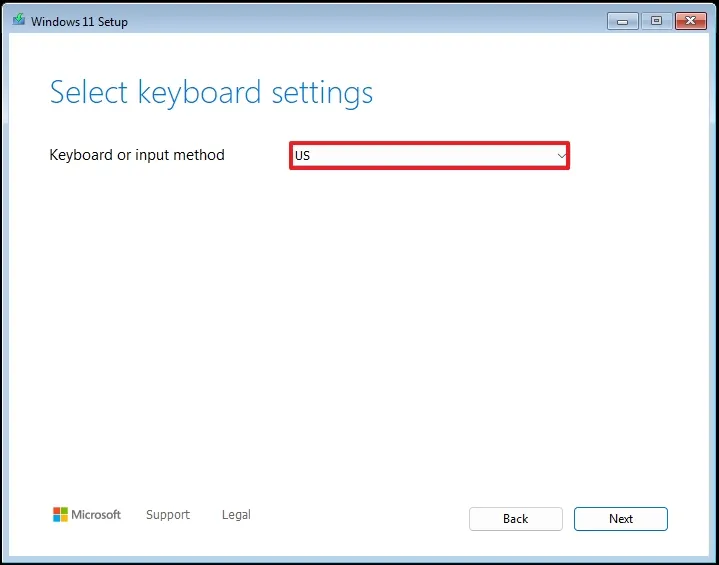
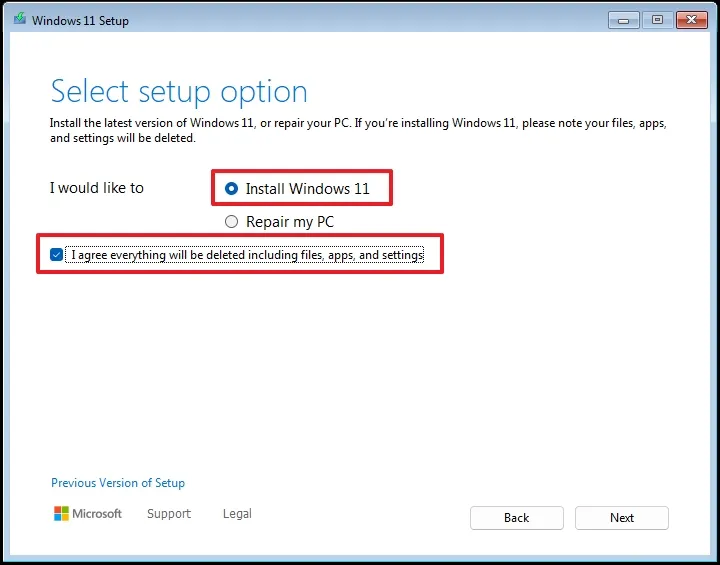
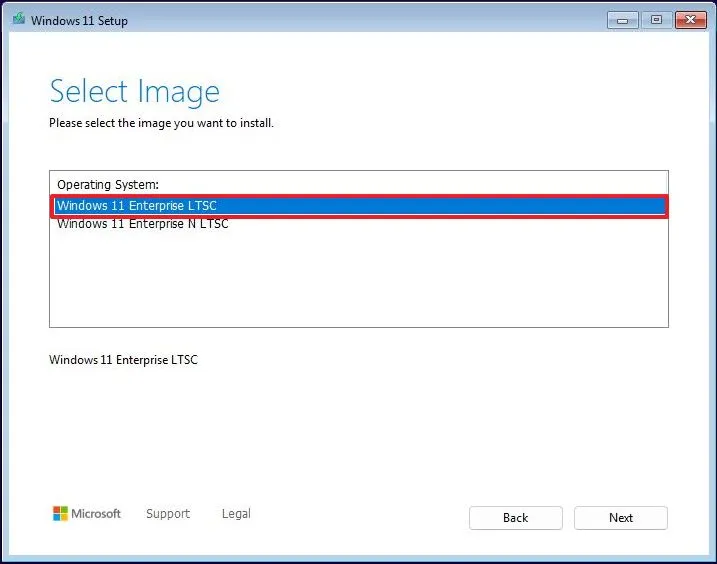
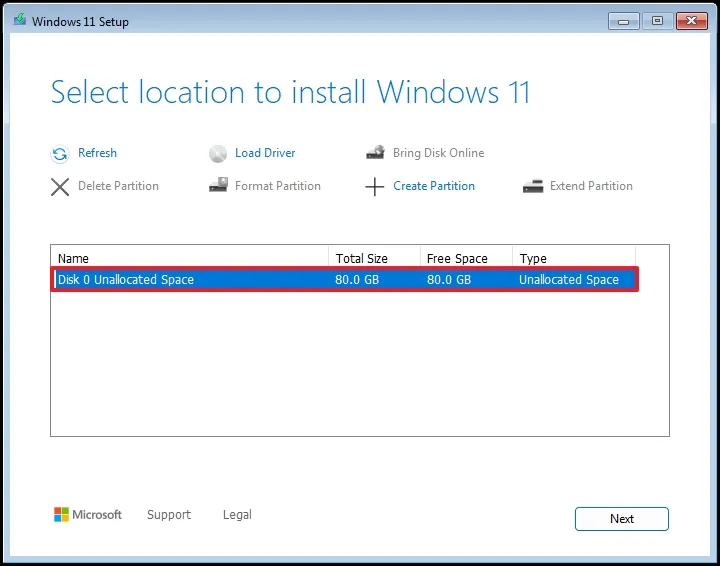
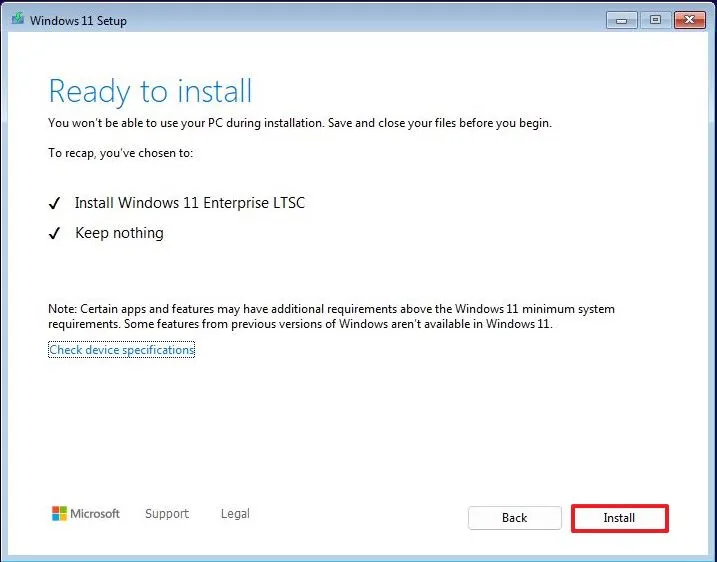
Step 4. Install Windows 11 LTSC
- Once the system boots from the USB, you’ll see the Windows Setup screen. Follow the on-screen instructions to select your language, time zone, and keyboard layout.
- Next, choose the Custom (Advanced) installation option to perform a clean install.
- Select the partition where you want to install Windows 11 LTSC. If necessary, format the partition to ensure a fresh installation.
- Windows will begin installing, and your computer will reboot several times during the process. Just follow any prompts that come up.
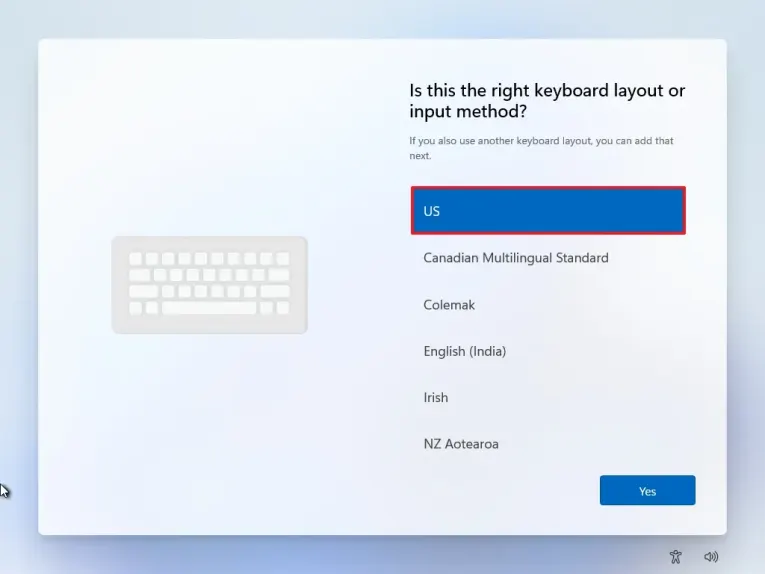
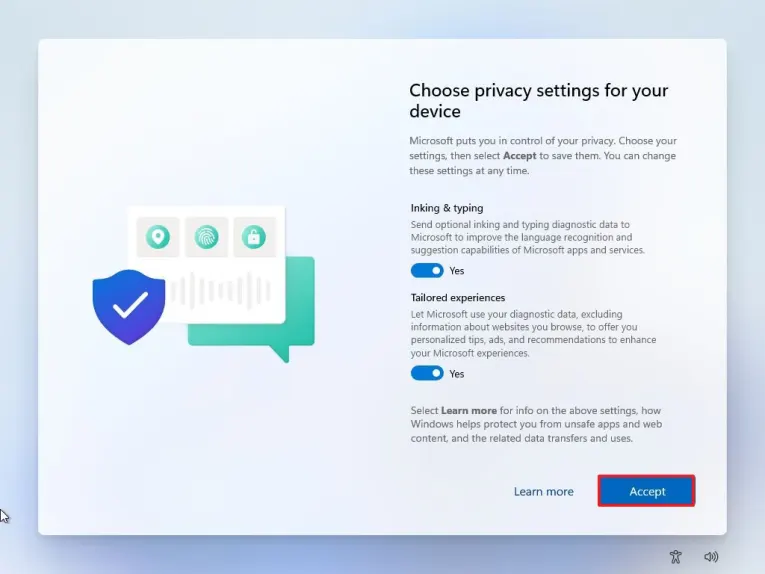
Step 5. Complete the Setup
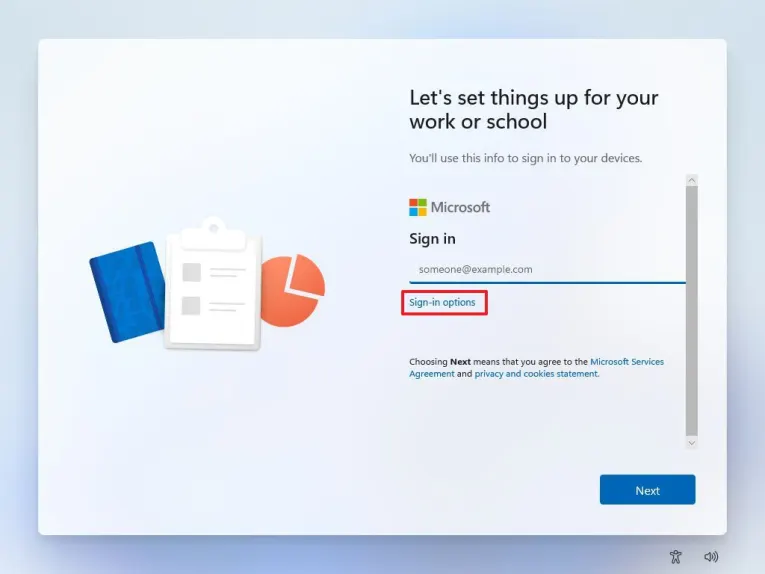
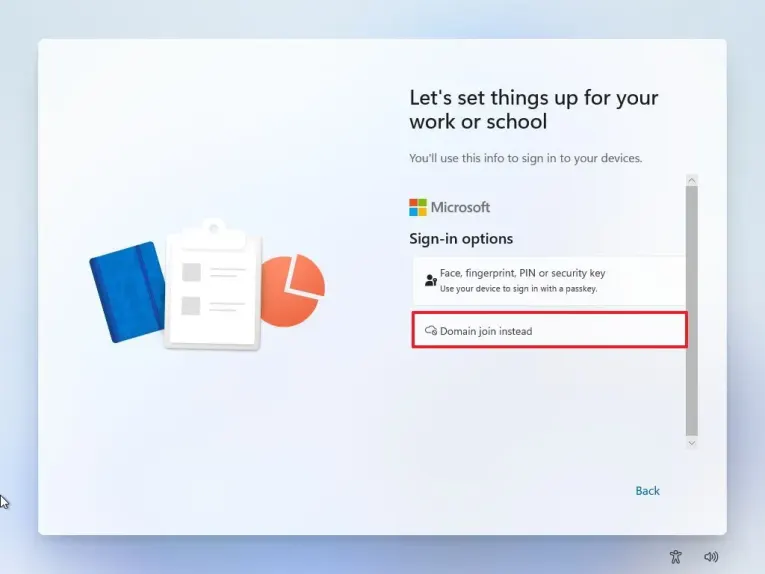
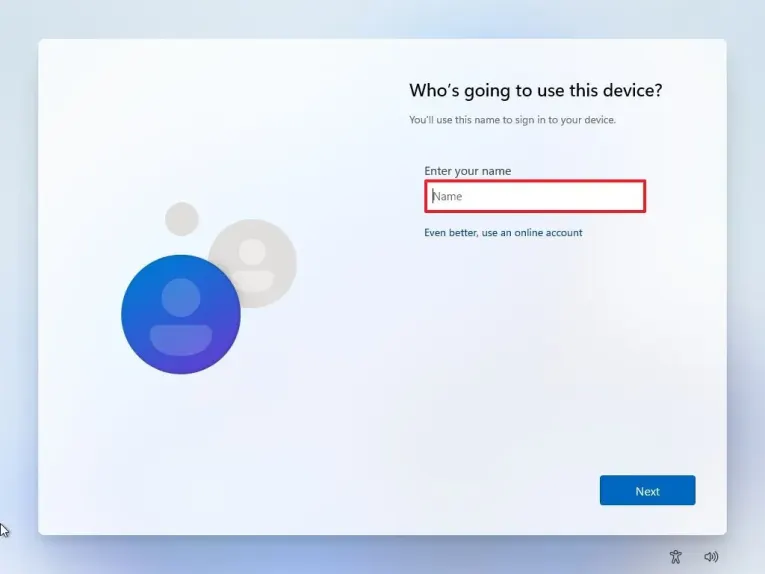
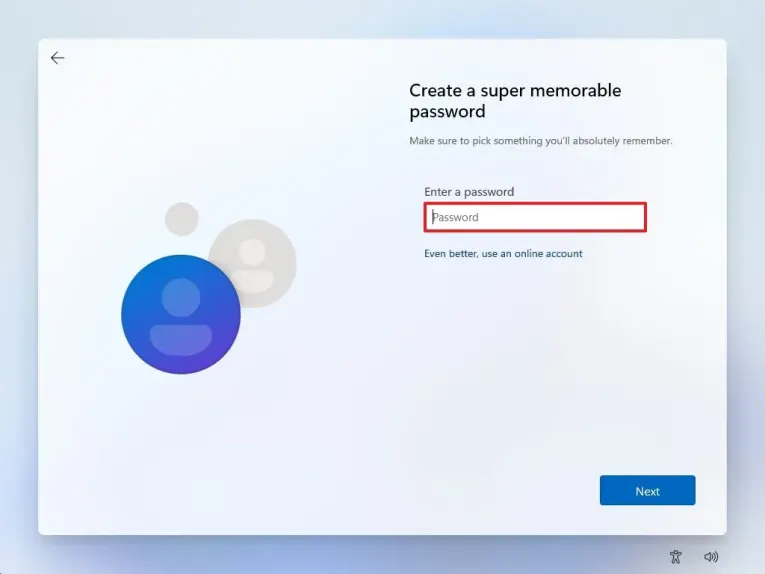
- After installation, you’ll go through the initial setup process, including creating a user account, setting up your region, and connecting to Wi-Fi (if applicable).
- When you reach the Product Key section, enter your LTSC product key, or you can choose to activate later if you don’t have one handy.
- Complete the rest of the setup process, and you’re good to go!
Note: For better understanding, I have provided the step-by-step screenshots in the below gallery. Right-click on the image to view it in full size.


Post-Installation Tips
Once you’ve installed Windows 11 LTSC, there are a few things you might want to do to make sure everything is working smoothly:
- Install Drivers: Make sure all your hardware drivers are up to date. Windows 11 LTSC should automatically detect and install most drivers, but it’s worth checking your device manager to ensure everything is working.
- Run Windows Update: Even though LTSC doesn’t get feature updates, you’ll still need to install any security patches or bug fixes. Run Windows Update after installation to make sure you’re up to date.
- Create a Backup: It’s always a good idea to create a system image or backup after installation, so you can easily restore your system if anything goes wrong.
- Disable Unwanted Features: You can disable or remove any features you don’t need, like Cortana or unnecessary apps, to further streamline your system.
What is the price of Windows 11 LTSC?
The price of Windows 11 LTSC (Long-Term Servicing Channel) is not fixed like regular consumer editions, as it is sold primarily through Microsoft’s Volume Licensing program. The cost can vary depending on several factors, including the number of licenses, the type of agreement (such as enterprise or volume licensing), and additional services requested.
As a general idea, Windows 11 LTSC licenses are typically priced between $100 to $300 per license. However, this is a rough estimate, and prices may fluctuate based on your specific situation.
For more precise pricing, businesses and organizations need to contact Microsoft directly or purchase through authorized resellers. Additionally, Windows 11 LTSC is not available for individual retail purchases, meaning you would need to access it through a business or organizational license.
For example, Windows 11 IoT Enterprise LTSC 2024 has been listed at around $202.99 per license, but this is specific to certain specialized versions like IoT (Internet of Things) rather than the standard Enterprise version.
If you are looking for Windows 11 LTSC for business use, it’s best to reach out to Microsoft or an authorized reseller for exact pricing details.
Conclusion
Installing Windows 11 LTSC is a great choice if you want a stable, secure version of Windows without the constant updates and feature changes. Whether you’re an IT professional looking for a long-term solution or just someone who values a reliable system, LTSC has you covered. By following this simple, step-by-step guide, you’ll be up and running in no time. Happy installing!


